Train Simulator Controller: Laser-Cutting a Door Control Panel
In my ongoing quest to build a realistic dashboard and controller for Train Simulator, I have gradually pieced together controls and instruments, generally starting small and building up to bigger pieces. I have documented, for example, building a CAN controller to underpin every instrument and control (and its later versions), embedding that into components like an air gauge and a DRA button, and in turn chaining those together into a fledgling shadow of the majestic final product I envision. Conspicuously absent is the wooden, metal, or plastic structure to contain these, to make the big leap from scattered components on a desk to a coherent, train-like dashboard.
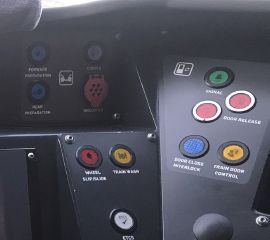
As previous blog posts have mentioned, I had intended to make as nearly perfect a replica of a Class 80x dashboard as I could, shaped, scaled, and laid out exactly like the prototype. I have the right buttons, many of the right types of instruments (if not the exact types used in the Class 80x), and I of course have the correct train in Train Simulator, thanks to both Dovetail and Armstrong Powerhouse. However, when I sat down with my good friend and long-time collaborator Tim “geekboy1011” Keller to discuss the logistics of building the physical modules into which the controls will be placed, he suggested starting smaller. Before (or instead of) building those Class 80x-esque panels from laser-cut metal, he advocated a version 1 (a) built of wood and (b) laid out to be modular, easily disassembled, stowable, and movable. With that in mind, I picked a simple unit of the dashboard, one of the two door control panels present on every Class 80x dash, and began prototyping.
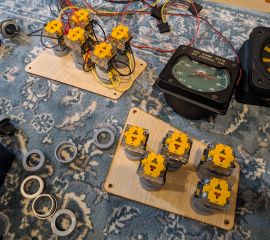
The first cardboard prototype was deceptively simple: the hardest part was determining the dimensions of the real one, and how to lay out the five buttons present on each panel. I had already (finally) determined what real buttons were used on the panel and sourced quite a few of them, in part by purchasing the buttons, their components, and the switch elements that attach to the back of the buttons, in part by purchasing two real Class 313 dashboards and partially disassembling them. Don’t worry: I’ve saved the metal dashboards and the gauges, and thoroughly photographed them should there ever be interest in rebuilding these scrap-salvaged dashboards.
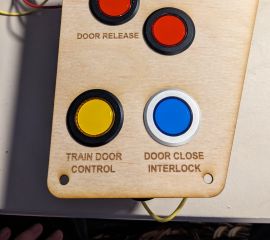
With the real buttons in hand, I measured the distances between the door control buttons in photographs of Class 80x dashboards, using the buttons themselves for scale. These five buttons are laid out as follows:
- A green Signal button at the top that signals the guard (via buzzer).
- Two red Door Open buttons that must be depressed simultaneously to open the doors on that side in Driver-Only Operation (DOO) mode. These illuminate when the doors are open.
- A blue Door Close/Interlock illuminated button at the bottom used to close the doors, and to show when the train’s doors are interlocked (that is, all doors are provably closed and power can be applied).
- A yellow Train Door Control button at the bottom that switches door control modes.
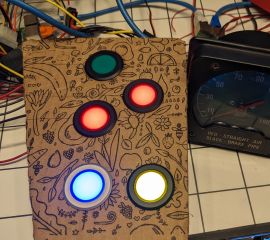
A first version was prototyped in cardboard, using the same buttons and contacts as in the real Class 80x:
As with all of my instruments and controls, one of my CAN bus controllers links the buttons and LEDs in the door controls to the PC running Train Simulator via a single CAN bus adapter. I used this for a while in my Train Simulator setup, to see how it worked and to fine-tune the PC software and the firmware. To my chagrin, Train Simulator doesn’t really support door controls properly: in the game, you usually press T to open the doors, and they automatically close (in fact, in most trains they cannot be manually closed). Different trains support different subsets of controls, and very few support separate left and right controls, let alone actually opening train doors via with the RailDriver interface instead of with the keyboard. My experiments with Armstrong Powerhouse’s Class 80x were more successful than with any of Dovetail’s trains, but still did not allow full door control. I was quite surprised to discover how different the RailDriver interfaces presented by different trains are, and this will surely be the subject of both a future blog post and significant PC-side software development.
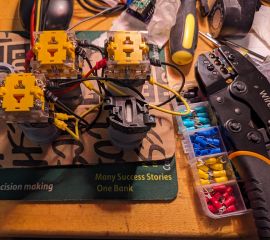
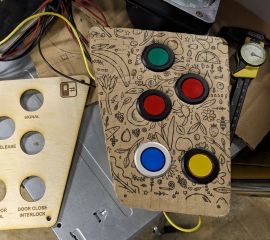
Over two days with geekboy1011, we prototyped and refined thin laser-cut plywood versions of this door control panel, in both left-side and right-side versions, complete with the accurate text and icons from the real Class 80x. A few days later, I dove back into my pile of buttons, crimp lugs, and wire, and wired these door controls up.
And finally, I connected these up to my full setup, and continued testing and developing the software.


